Electric Fireplace Insert with Remote Control
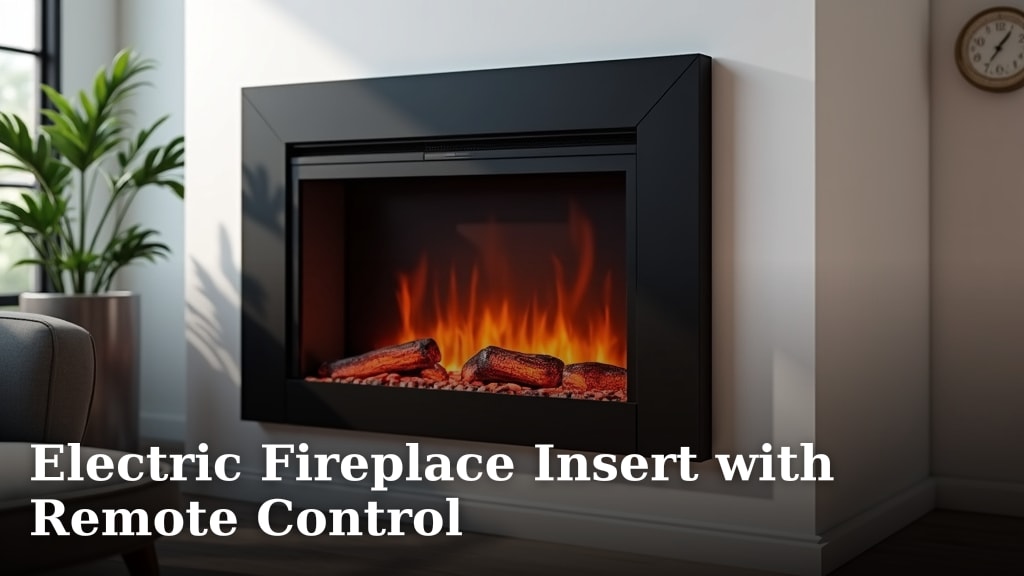
An electric fireplace insert with remote control is a heating appliance that slides into an existing fireplace opening and lets you adjust settings from your couch. It provides realistic flames and supplemental heat without the mess or maintenance of a wood fire. The remote means you control everything, from flame height to temperature, with the push of a button.
Many shoppers choose these inserts to upgrade a non-working fireplace into a functional and stylish feature. They found this is an efficient way to add cozy ambiance and warmth to a room. The technology has improved, so many models now offer very convincing flame effects and quiet operation.
- They fit into most standard fireplace openings for a clean, built-in look.
- You get instant ambiance and heat with zero smoke, ash, or chimney cleaning.
- Most units are energy-efficient, using only electricity to operate.
- The remote control offers the ultimate convenience for adjusting heat and flame effects.
- Installation is typically simple, requiring no special tools or professional help.
Below, we walk through exactly how these inserts work, the key features to look for, and how to choose the right one for your home.
Finding the Right Electric Fireplace Insert for Your Space
You’ve decided an insert is for you. Now you’re faced with a wall of options, and you want the one that fits perfectly. The best choice isn’t just about looks. It’s about matching the unit’s size, heat output, and features to your room and your habits. We’ll guide you through the key factors so you can shop with confidence.
Measure Twice, Buy Once: Getting the Size Right
The first step is a careful measurement. An insert needs to fit snugly inside your existing firebox opening. Measure the width, height, and depth of your fireplace opening at its narrowest points. Write these numbers down.
Most manufacturers provide clear size specs. They will list the insert’s dimensions and the fireplace opening sizes their product is designed to fit. We found that choosing an insert slightly smaller than your opening allows for easy installation and proper airflow. A gap of an inch or so on the sides is normal and can be filled with trim for a finished look.
Understanding Heat Output and Room Size
You’re buying this for warmth as well as ambiance. Heat output is measured in BTUs (British Thermal Units). Think of it like the wattage of a lightbulb—the higher the number, the more heat it gives off.
- Small rooms (up to 400 sq ft): A 4,000-5,000 BTU model is often sufficient.
- Medium rooms (400-600 sq ft): Look for 5,000-8,000 BTUs.
- Large rooms (over 600 sq ft): You may need 8,000-10,000+ BTUs or a supplemental heater.
Many experts note that these inserts are best used for supplemental zone heating. They can take the chill off a living room on a cool evening, helping you lower your central thermostat and save on overall energy bills (U.S. Department of Energy).
Do you need a thermostat?
Almost all electric inserts include a basic thermostat. It cycles the heater element on and off to maintain a temperature you set on the remote or unit controls. For consistent, hands-off comfort, this is a key feature. You set it and forget it.
Realism in the Flames: What to Look For
The flame effect is the heart of the experience. Technology here ranges from basic to breathtaking. You’ll generally encounter three types:
- LED Flame Effects: This is the most common and energy-efficient technology. Modern LED systems can produce incredibly realistic and vibrant flames. They last for tens of thousands of hours with minimal power use.
- Rotating Mirror Effects: Some models use spinning mirrors or prisms to reflect light, creating moving flame images. This can look very convincing and adds a dynamic element.
- Water Vapor Effects: These are often found in higher-end models. They produce a very lifelike, three-dimensional flame and even a slight mist that dissipates with the heat. It’s the closest you can get to a real fire without the smoke.
Don’t just trust the photos on the box. If possible, check video reviews online to see how the flames actually look in motion and in a dimly lit room. Look for options that allow you to control flame color, speed, and brightness. This customization lets you match your mood or the time of day.
Decoding the Remote Control Functions
The remote is your command center. A basic remote will handle power, heat settings, and flame on/off. A better remote is a game-changer for convenience. Look for these functions:
- Thermostat Control: Allows you to set a specific temperature from your chair.
- Timer: Set the insert to turn off automatically after 1, 2, 4, or 8 hours. This is perfect for bedtime or if you’re falling asleep on the couch.
- Flame Controls: Separate buttons to adjust flame brightness, color (on multi-color models), and speed.
- Full Feature Control: The best remotes let you control everything without getting up. They often feel like a TV remote and are backlit for use in the dark.
We found that a quality remote with a clear line-of-sight range of at least 15 feet is essential for true convenience. Some models even offer smart home compatibility, letting you use an app or voice commands if that’s your style.
A Simple Installation Guide for Most Inserts
For many homes, installation is a straightforward DIY project. The general process involves these steps. Always follow the specific manual that comes with your unit.
- Prepare the Space: Clean out the old firebox. If your insert is vented, ensure your chimney or flue is properly capped and sealed. For non-vented units, make sure the area is clear.
- Slide It In: Most inserts are designed to slide directly into the opening. You may need to level it using shims.
- Connect the Power: The vast majority plug into a standard 120-volt household outlet. Never use an extension cord. We found that having the outlet located inside or very near the firebox creates the cleanest look.
- Attach Trim or Surround: Use the included trim pieces to cover any gaps and give the insert a polished, built-in appearance.
- Test Everything: Turn on the flames, test the heat, and check all remote functions before settling in.
If you’re not comfortable with basic electrical checks or your fireplace opening is non-standard, hiring a handyman for an hour is a worthwhile investment for peace of mind.
Maintenance and Cleaning: It’s Simpler Than You Think
This is where electric shines compared to wood. You won’t need to shovel ash or clean soot off the walls. Regular care is minimal and easy.
- Dusting: Use a soft, dry cloth to wipe the glass front and outer surfaces. Turn the unit off and let it cool first.
- Interior Cleaning: Once a year, turn off and unplug the unit. Use a vacuum with a brush attachment to gently remove any dust from the logs, crystals, or interior components.
- Inspect the Cord: Check the power cord periodically for any signs of wear or damage.
Because there is no combustion, there’s no risk of creosote buildup or chimney fires. The biggest maintenance task is remembering where you put the remote!
Heating Costs and Energy Efficiency
Running an electric insert is affordable, especially when used to heat a single room you’re occupying. The U.S. Department of Energy states that electric resistance heating is 100% efficient at the point of use—meaning all the electricity that goes in is converted to heat in the room.
To estimate your cost: multiply the unit’s wattage (usually listed on the back) by the hours of use, then by your local electricity rate per kilowatt-hour (kWh). For example, a 1,500-watt heater running for 3 hours uses 4.5 kWh. At $0.15 per kWh, that’s $0.68. Using a fireplace insert to lower your whole-home thermostat by a few degrees can lead to noticeable savings over a heating season.
Your Pre-Purchase Checklist
Use this list to make sure you’ve covered all your bases before clicking “buy.”
- ✓ I have measured my fireplace opening (width, height, depth) and confirmed the insert will fit.
- ✓ I know the square footage of my room and have matched it to the insert’s BTU rating for adequate heat.
- ✓ I have a convenient electrical outlet nearby (inside the firebox is ideal) that does not require an extension cord.
- ✓ I have checked the remote’s features to ensure it includes the thermostat and timer functions I want.
- ✓ I have watched video demonstrations of the flame effects to ensure I like the realism and color.
- ✓ I have a plan for finishing touches like a trim kit or surround to cover any gaps for a clean look.
Optional Accessories for a Complete Look
A few add-ons can take your installation from “inserted” to “built-in.” A decorative trim kit or surround is the most popular. It frames the insert and covers any rough edges or small gaps, providing a seamless transition to your wall. Some companies offer specific mantel packages that combine the insert, trim, and a surround mantel for a complete, furniture-like appearance. Make sure any accessories you consider are compatible with your specific insert model.
What about built-in shelving?
If your fireplace is part of an entertainment center or has cabinets, ensure you leave enough clearance for ventilation. The insert needs space for air to flow in at the bottom and exit as warm air from the top or front. Blocking these vents can cause the unit to overheat and shut off automatically—a built-in safety feature.
Making the Final Choice
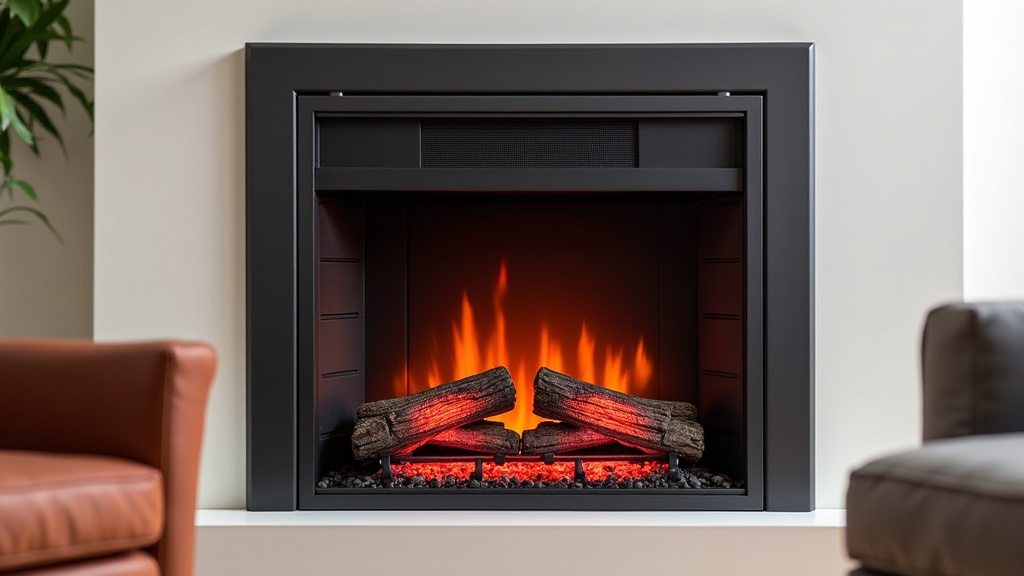
With all this information, you’re ready. Remember, this is an appliance meant to serve you for years. Prioritize the features that matter most to you: a convincing flame, reliable heat, and a remote that makes life easier. Don’t pay for fancy extras you’ll never use, but don’t skimp on core functions like a good thermostat and timer.
The perfect electric fireplace insert is the one that fits your space, matches your style, and reliably delivers the cozy warmth and ambiance you’re looking for. Take your measurements, review this checklist, and choose with confidence. Your living room is about to become your favorite spot in the house.
Conclusion
You now know how to choose an electric fireplace insert that fits your space and style. Focus on getting the size right, matching the heat output to your room, and picking flames that feel real. The remote control should offer the convenience you want, like a thermostat and timer. Installation is usually simple, and maintenance is straightforward. We found that these inserts provide a clean, efficient way to add warmth and ambiance. Your next step is to use the pre-purchase checklist, take your measurements, and shop with confidence. Your cozy upgrade is within reach.
Frequently Asked Questions
How much does it cost to run an electric fireplace insert?
We found that running an electric insert is affordable. Cost depends on your local electricity rate and how long you use it. For example, a 1,500-watt unit for three hours might cost under a dollar at average rates.
Can I install an electric fireplace insert in a rental home?
Yes, most electric inserts are renter-friendly. They slide into an existing fireplace and plug into a standard outlet, requiring no permanent changes. Always check your lease agreement and get landlord approval if needed.
Do electric fireplace inserts really heat a room?
Yes, they provide effective supplemental heat for a single room. They are best for zone heating, helping you lower your central thermostat. Heat output is measured in BTUs, so choose one that matches your room size.
Are the flames from electric inserts realistic?
Many modern inserts have very convincing flame effects. Technology varies, but LED and water vapor models can look strikingly real. We recommend watching video reviews to see how they appear in motion and low light.
What safety features should I look for?
Key safety features include automatic overheat protection and a cool-touch glass front. These units shut off if they get too hot, preventing hazards. Always ensure proper airflow and follow the manufacturer’s guidelines for safe use.